Inspired Ideas: DIY headboard ideas that we love
Simple but ingenious. Who knew that metal roofing could be so stylish? This unique headboard gets a rustic, but yet shiny glamorous feel.  It was possible by cutting into this shape a piece of corrugated tin making it a unique style statement.
[image]
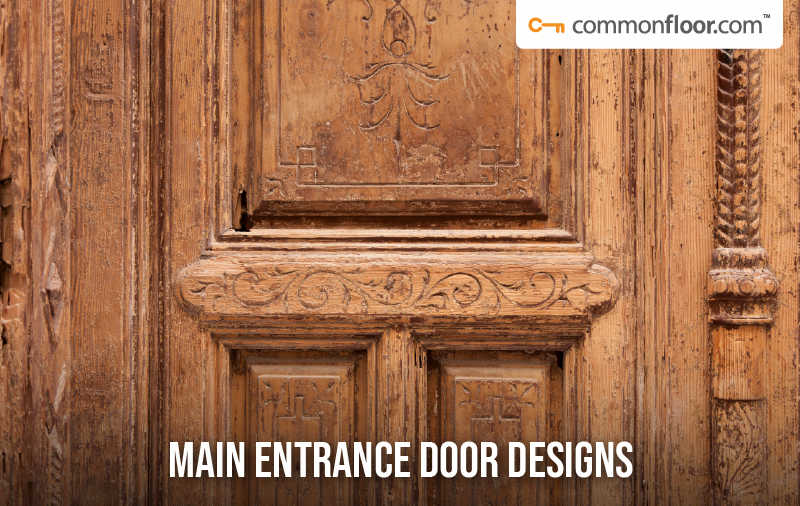
A pair of reclaimed old doors add a tremendous visual weight to this dreamy bedroom. The airy bedroom is enhanced by plenty of natural light and white painted walls. Also into the room can be found other vintage elements starting with the sparkling chandelier.
[image]
This hand carved Indian Rosewood screen found at a flea market adds texture to the interior and an oriental touch to the bedroom. Hand crafted objects have a lot more value and it establishes a connection between the two persons involved. The four-panel screen fits perfectly above the king-size bed.
[image]
A cool way to create a headboard that kind of goes anywhere is with these unfinished shutters. This brings a bit of texture into the room among decorative letters and pillows.
[image]
This garden-inspired bedroom has as a headboard from a traditional white fence. This unique item is paired with sunny yellow walls and the country side bedding. Overall the room gets a fresh spring feel, a perfect way to get up in the morning relaxed, with the batteries charged, ready for another day.
[image]
A cool way to create an headboard is with folding closet doors and garnished with decorative paper pasted into middle and secured to the wall.
[image]
One of my favorite ways to achieve a modern bedroom is like in this case over here. Take a large piece of artwork and put it behind your bed. It’s that simple. Choose a picture that matches your decor and you can give your room personality very easy.
[image]
Go beyond the basic headboard and make the entire wall behind your bed a headboard. Distressed barn wood planks run the length of the wall behind this bed. To create the look, measure your wall to determine what length of planks you’ll need and how many it will take to cover the wall from top to bottom. Starting at the ceiling, secure the planks using nails at several points along the board, ensuring some of the nails are driven into studs. Continue down the wall, butting the top of the next board against the bottom of the previous board.